
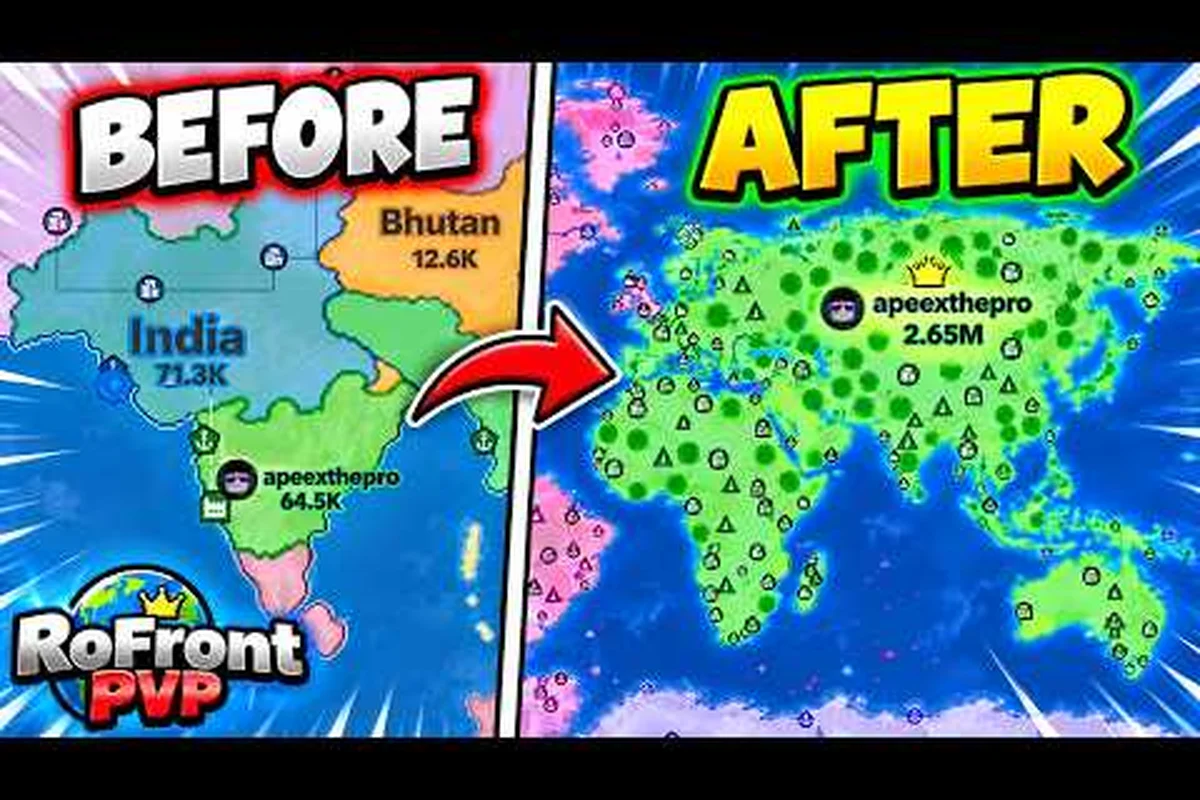
Timing decides whether a nuke becomes a decisive breakthrough or an expensive reset. In RoFront, launch the WMD only when the 80% control objective is within reach: a slightly lower control percentage with insufficient income can waste the nuke, while striking at peak control can turn the WMD into a decisive breakthrough. This rofront nuke timing guide explains how to balance income, control pressure, and target selection, including the weapons-overview signals that make a target worth attacking and the cost curve that determines when a nuke is worth saving.
Core Ideas for Choosing Strike Timing
A nuclear strike matters most when it turns temporary weakness into permanent territory. The official RoFront game page describes a shared world with 88 player nations, hundreds of tribes, and an objective of conquering 80% of the world. That means the best timing is rarely “as soon as possible.” A well-timed nuke can break a stalled front, punish an overextended opponent, and accelerate your route toward the 80% control target.
The central principle is impact before cost. A strike should create more strategic value than the resources and vulnerability required to launch it. If it merely damages a target that can rebuild quickly, the timing is poor. If it removes a major enemy, opens a corridor, or prevents a stronger coalition from consolidating, the same strike may be excellent.
Key timing signals
Before committing, evaluate five connected signals rather than one isolated factor: nuke value comes from how the target’s military pressure, territorial position, economy, launch readiness, and defensive isolation interact at that moment. For example, striking a frontier nation that is already losing ground and has diverted troops to a second front can multiply the nuke’s effect, but poor income stability may make the resulting counterattack cost more than the target is worth. A stronger case is a strategically vital neighbor controlling a production hub or chokepoint, provided your launch conditions are active and the target cannot quickly reinforce it.
-
Target pressure: The opponent is already losing ground, defending several fronts, or sending forces elsewhere.
-
Strategic value: The target controls territory, production, chokepoints, or alliances that matter to your route toward 80% control.
-
Income stability: You can replace the money, resources, or production diverted by the nuke without falling behind elsewhere.
-
Operational readiness: Your launch conditions are active and your nearby territory is not vulnerable to an immediate counterattack.
-
Opportunity window: The target cannot easily rebuild, relocate defenses, or receive immediate protection from a stronger nation.
These signals create a practical decision framework. A target under pressure and separated from allies is usually easier to damage, but a heavily defended position can still be worth striking if it blocks a wider campaign. The important question is whether the result improves your territorial position enough to justify the expenditure.
Pre-strike checklist
| Signal | Green-light condition | Warning sign |
|---|---|---|
| Target condition | Enemy is losing territory or overextended | Enemy is stable and consolidating |
| Defensive exposure | Key area is lightly protected | Target has multiple defensive layers |
| Your economy | Income continues after the strike | Strike creates a major deficit |
| Front stability | Your home territory is secure | Enemy can counterattack immediately |
| Strategic payoff | Strike unlocks territory or weakens a rival | Damage has no clear follow-up |
| Timing window | Short window before defenses improve | No urgency beyond venting frustration |
Community observations are useful here, but exact nuke costs, build times, and damage figures should be treated cautiously. RoFront launched in September 2026 and has already seen rapid iteration, yet it has no public changelog. Players report changing conditions as a reason to reassess rather than memorize one permanent timing rule.
RoFront wmd strategy for real objectives
A useful rofront wmd strategy treats a nuke as one part of a larger campaign rather than an isolated button press. Conventional attacks, alliances, production, and territorial expansion still create the opening. The nuclear option then magnifies the right condition at the right moment.
The RoFront nuclear strategy guide explains the launch-side basics, while this guide focuses on deciding when those tools should be used. A strong sequence normally follows a recognizable pattern: weaken the target, observe its response, preserve enough resources for the strike, and follow up before the opponent stabilizes.
Three timing models
| Timing model | Best situation | Expected result | Main risk |
|---|---|---|---|
| Punishment strike | Enemy expands aggressively and becomes vulnerable | Recovers ground and discourages overextension | Enemy already has stronger defenses |
| Breakthrough strike | A valuable corridor remains blocked | Opens a route toward wider control | Target is heavily fortified |
| Disruption strike | A rival is close to consolidating power | Delays a dangerous coalition or expansion | Your economy cannot absorb the cost |
| Consolidation strike | Opponent is fragmented after a major defeat | Converts temporary advantage into lasting territory | You strike too late for maximum effect |
Punishment timing works when an enemy becomes greedy. If they spread forces across several objectives, launch a strike only after you can identify which exposed position is causing the most damage. The best target is not always the largest one; sometimes a smaller front becomes a wedge that splits the enemy’s defense.
Breakthrough timing focuses on geography. A narrow border, important port region, or central territory can multiply the value of a strike because its loss opens several routes. This approach supports a rofront weapons guide focused on conquest: first determine what the target controls, then ask whether removing it advances your route toward 80% control.
Disruption timing is strategic rather than territorial. Sometimes the ideal target is not one you can conquer immediately but one whose continued growth threatens your position. Striking during its consolidation phase can force it to spend resources on defense. The payoff is time and pressure, but you should still have a credible follow-up plan.
A campaign-based decision sequence
Before committing to a nuclear launch, pause and compare the potential territorial gain with the resources the strike will consume, including production that must continue during the launch window. A nuke is most valuable when it removes a fortified objective or disrupts a concentrated defense, but it is wasteful if ordinary tanks, aircraft, or artillery can secure the same ground more cheaply. This check keeps your rofront WMD strategy tied to measurable campaign progress rather than turning a powerful weapon into an impulsive attack.
-
Identify the strategic problem. Name what the nuke must change: a blocked corridor, dangerous consolidation, lost territory, or a failed defense.
-
Check the target’s resilience. Look for rebuilding capacity, nearby allies, and signs of concentrated defense.
-
Price the distraction. Estimate what ordinary attacks, production, or diplomacy could accomplish with the same resources.
-
Confirm your economy. Ensure the planned strike does not slow the rest of your campaign below the required pace.
-
Select the launch moment. Strike when defenses are spread and your immediate positions are stable.
-
Define the follow-up. Decide which territory you will take, which production you will protect, and how you will respond to retaliation.
This sequence makes a nuke part of a campaign rather than an isolated event, keeping your rofront WMD strategy tied to concrete frontline goals. Every launch should have a clear objective, a limited time window, and a measurable territorial payoff—for example, using one nuke to sever a fortified corridor so conventional armor can capture the exposed supply route without extending the launch beyond the army’s required production pace. The useful metric is not blast radius alone, but how many tiles, structures, or enemy production slots the strike enables your units to control before retaliation changes the battlefield.
RoFront weapons overview: where nukes fit
Nukes occupy the highest-impact end of the weapon hierarchy, but they are not automatically the right tool. This rofront weapons overview compares their role with conventional attacks, support choices, and territorial objectives. The strongest weapon is the one that solves the current problem without creating a larger one elsewhere.
| Weapon type | Best use | Timing advantage | Main limitation |
|---|---|---|---|
| Conventional attack | Testing defense and taking manageable land | Low commitment and flexible target selection | Gradual against fortified positions |
| Support weapon | Protecting expansion and reducing pressure | Creates safe operating windows | Does not solve every major blockage |
| Nuke | Breaking a critical position or punishing a vulnerable rival | Can create a sharp territorial shift | High cost and possible retaliation |
| Economy investment | Funding later strikes and wider expansion | Improves long-term flexibility | No immediate battlefield shock |
| Diplomacy | Reducing multi-front threats | Preserves resources for other fronts | Uncertain and dependent on other players |
Community references often describe conventional weapons, economy, and nukes as parts of the same progression. In practical terms, early conventional strength gives you access to territory, territory produces income, and income eventually supports a nuke. The transition should therefore feel like a planned escalation.
Strongest weapon in RoFront: context matters
When players ask for the rofront strongest weapon in rofront, there is no need to pretend that the answer is always the same. A nuke can have the highest battlefield impact, but conventional weapons may be more reliable against a lightly defended border. Economy can be the strongest strategic asset when the goal is a server-long campaign, and diplomacy may outperform both when several nations are converging on the same territory.
Choose by the problem you need solved, then test the decision against the strike’s timing, cost, and likely retaliation. For example, save a nuke for a capital or major border when a short conventional assault cannot secure the objective, but launch it before the target can reinforce. If a WMD is too expensive for your current treasury, conventional weapons may reach the position sooner; the strongest choice is the one that creates lasting territorial advantage without leaving your economy exposed.
-
Choose a nuke when a single position has disproportionate strategic value and ordinary attacks cannot open it efficiently.
-
Choose conventional weapons when the target is exposed but you want to limit escalation or conserve expensive resources.
-
Choose economy when several fronts compete for your attention and the best answer is sustained growth.
-
Choose diplomacy when an enemy’s strongest ally is the real obstacle.
This distinction prevents a common mistake: treating maximum damage as maximum value. A devastating strike aimed at an irrelevant corner may deliver less total advantage than a precise conventional attack on a central border, especially when the nuke’s WMD cost drains the treasury needed for follow-up conventional weapons. For example, if a target capital sits beside a defended border, saving the nuke until reinforcements are concentrated can create a larger territorial gain; against a remote, lightly defended tile, a conventional assault may capture the objective earlier while preserving funds for the next front. In practice, compare expected territory, treasury cost, likely retaliation, and the time available before reinforcement—not the nuke’s headline damage alone.
Spend priority
Before buying or saving for a nuke, compare it with the next meaningful upgrade. A small increase in income can fund multiple conventional pushes, while a nuke concentrates resources into one dramatic action. The RoFront nuke guide can help with unlock and launch details, but the strategic question remains whether nuke funding is taking priority over stronger sustainable play.
A sound spending order usually looks like this: stabilize core income first, secure essential frontline capacity, then add border or expansion tools before diverting resources into a nuke reserve. For example, if a player can increase income enough to fund several conventional pushes, that surplus is generally more valuable for long-term map control than accelerating a WMD launch. Nuke timing becomes stronger when the reserve covers the full strike without interrupting future income production.
| Priority | Investment | Reason |
|---|---|---|
| 1 | Core income stability | Supports every later action |
| 2 | Essential frontline capacity | Prevents dangerous reversals |
| 3 | Border or expansion tools | Produces additional territory and income |
| 4 | Nuke reserve | Enables a decisive strike without disrupting the economy |
| 5 | Additional flashy weapon | Adds power only after fundamentals are secure |
The reserve should cover the entire nuke launch and leave enough resources to rebuild afterward, rather than merely reaching the unlock and activation costs. If spending it creates an emergency deficit, the timing relies on hope instead of a stable WMD strategy. For example, if the strike cannot be followed by even one conventional frontline push or a rebuild of essential border capacity, the reserve is too small and the launch may sacrifice more map control than it gains.
RoFront weapons guide for target selection
Target selection is where timing becomes actionable. In this rofront weapons guide, a high-value target is defined by four properties: it sits on your route to 80% control, it is currently reachable, its defenses are temporarily compromised, and the result helps you defend or exploit the opening.
Start with map relevance, not visual size. Large territories may be impressive but peripheral to your immediate route. A compact enemy position can be more valuable if it blocks a corridor, supports an alliance, or connects two regions you want to control. Before committing, draw a simple relationship between the target, your main base, your current front, and your next expansion direction.
Target-value matrix
| Target condition | Territorial value | Timing value | Recommended response |
|---|---|---|---|
| Central and lightly defended | High | High | Strong candidate for a well-timed strike |
| Peripheral and stable | Low | Low | Conventional attack is usually more efficient |
| Central but heavily defended | High | Low | Create another front or weaken defenses first |
| Peripheral but rapidly growing | Low now | Medium | Monitor; disrupt if it threatens a larger plan |
| Fragmented enemy with weak allies | Medium | High | Strike before they reorganize |
| Enemy backed by a powerful coalition | Medium | Low | Improve diplomacy or posture before striking |
Target readiness should also include what happens immediately after impact. Can you occupy the damaged area? Can nearby allies respond before you consolidate? Will the target redirect forces toward you and expose another border? A strike that wins space but cannot hold it is only a temporary disruption.
A second check is retaliation risk. A direct attack on a trusted ally can turn a manageable competitor into a permanent enemy, while a strike on an already hostile nation may carry less diplomatic cost. Although alliance systems can change, a single devastating attack can influence how neighboring nations perceive you. Use the nuke strategy overview to compare the strategic consequences before finalizing a target.
Observe before committing
Timing improves when you watch patterns instead of reacting to one event. Track the target’s troop movements, construction activity, border pressure, and recent expansion. Community experience suggests that players often wait for a vulnerable opening, then strike while attention is divided. That observation is useful even though exact build times and damage values are not officially documented.
Use a short watch list to judge whether a nuke window is real: compare the target’s exposed border with the rest of its front, then note how many troop movements, construction projects, and active alliances could redirect attention. For example, if construction continues on one flank while reinforcements remain committed elsewhere, that sector may become viable sooner. Treat the list as a timing filter rather than a countdown, since undocumented build times and damage values can shift the practical result.
-
Deteriorating control: The target is losing land consistently.
-
Overcommitment: Several forces are active away from its vulnerable sector.
-
Delayed response: It has not reinforced the position despite visible danger.
-
Alliance friction: Its strongest support is occupied or hesitant.
-
Your advantage: Your nearby territory is secure and your income remains active.
If two or more signals align, the nuke timing is improving. If the target is stable, protected, and strategically irrelevant, patience offers more value. This distinction also helps players seeking the rofront strongest weapon in rofront: a weapon is strongest only when deployed against a weakness that matters.
RoFront how to afford nukes without slowing the campaign
Affordability is not simply having enough money. A player can technically launch a nuke while leaving the wider economy exposed. The better measure is whether the nuke can be paid for while ordinary operations continue. That makes rofront how to afford nukes a question of cash flow, production, and opportunity cost.
Because RoFront has not publicly documented exact nuke prices, build times, or income values, avoid relying on a single universal number. Community reports can vary by server, nation size, and current version. Build a budget from what you can observe in your own session: income rate, production output, upgrade costs, and the resources actually available for weapons.
Affordability test
| Test | Healthy result | Risky result |
|---|---|---|
| Income coverage | Weapons budget is a planned share of income | Nuke consumes nearly all visible funds |
| Replacement capacity | Ordinary attack can continue after launch | Your next move depends on the nuke |
| Production resilience | Cities and factories keep generating | A counterattack interrupts production |
| Time horizon | Savings match the expected opening | You rush before the target is vulnerable |
| Goal alignment | Funds support a 80% control plan | You launch only because the option exists |
This rofront how to afford nukes approach emphasizes a nuke reserve. Build it gradually, keep it distinct from operational funds, and reduce it only when a real target window appears. A reserve prevents panic spending, while a clear reserve goal prevents the funds from being spent on ordinary upgrades every time they accumulate.
Build the economy around the objective
To support 80% control, treat income as part of your weapon system. Territory that produces resources is more valuable than an isolated conquest because it expands your ability to defend what you own. Before saving for a nuke, ensure your cities, factories, ports, and connected territory are functioning as intended. The official game page identifies these as central elements of expansion.
A practical plan follows four stages: first measure whether the current resource income can support the nuke reserve without starving city and factory production, then establish a protected frontline, generate pressure with conventional troops, and finally launch when the opportunity is strong. The key timing test is affordability, not simply reaching 80% control: if the nuke costs several income cycles, the reserve should remain intact while smaller attacks weaken enemy positions. This prevents a successful opening from turning into an economy collapse and preserves a later launch window for the RoFront weapons of mass destruction guide.
-
Stabilize production. Identify reliable income and remove unnecessary spending.
-
Secure the main front. A safe border protects the income used to fund future weapons.
-
Create repeatable pressure. Conventional attacks or support tools can hold enemy attention while the reserve grows.
-
Preserve the launch window. Do not spend the nuke reserve on routine upgrades during a developing opportunity.
If a large weapon would drain several income cycles, compare it with a series of ordinary attacks. The RoFront weapons of mass destruction guide is useful for late-game planning, but even advanced players should value sustainability. A faster route to 80% control is not helpful if your economy collapses as soon as you attack.
A simple launch budget
| Budget component | Keep available | Use only when |
|---|---|---|
| Core defense | Full | Your frontier is under pressure |
| Standard attack capacity | Most of it | A conventional push is needed |
| Nuke reserve | Entire amount | Target and timing are both strong |
| Long-term projects | Protected | They support stable territorial growth |
| Emergency reserve | Intact | A counterattack is active |
Exact nuke percentages cannot be confirmed officially, and personal spending habits will change them. The practical rule is to keep the nuke reserve intact, standard attack capacity available, core defense funded, and long-term projects protected, as the budget table shows. For example, save the nuke for a confirmed target window while a counterattack forces you to divide attention; spending it early may create a temporary power spike but leave your frontier and emergency reserve exposed. This is what separates a controlled launch from a desperate gamble.
Practical scenarios and timing corrections
The best timing changes as the map changes. A target that was ideal ten minutes ago may now be protected, while a developing weakness elsewhere may deserve attention. This section applies the guidance to common campaign situations and shows how to correct a poor decision.
Scenario one: the enemy is overextended
You notice a rival expanding on two fronts while one border remains lightly defended. This is a strong punishment window because attention is divided. Confirm that the weak point sits on your route or can protect a valuable expansion, then strike before the enemy consolidates.
Follow the strike immediately. If you merely watch the damage from a safe distance, the enemy may repair and reorganize. Your rofront nuke timing guide should therefore include a follow-up plan: conventional forces advance, nearby territory is protected, and your income remains stable. Timing plus follow-through creates a lasting advantage.
Scenario two: your ally asks for help
A trusted ally is losing territory to a larger opponent. Your immediate instinct may be to nuke the attacker, but the best target is the border or production area you can actually reach. Hitting a distant region produces dramatic visuals without solving your ally’s problem.
In this case, a coordinated conventional attack may be more effective. Diplomacy can buy time, while focused weapons preserve your reserve for a larger opening. A nuke becomes justified if the position is genuinely decisive, reachable, and isolated from quick reinforcement.
Scenario three: a target is rebuilding after an attack
Your first strike damaged the enemy, but you waited too long to capitalize. That delay let their borders stabilize, defenses return, and allies enter the conflict, reducing the nuke’s value from a decisive opening into a costly area-denial hit. For example, a strike that breaks an early base push can become ineffective if you launch before their repair timers expire and reinforcements arrive. The launch was powerful, but the timing was incomplete: in a rofront nuke timing guide, the key variable is not nuke power alone, but whether the blast lands before the target can rebuild.
Correct this by using the weaker position to pin their attention with conventional pressure. Watch for a second opening rather than immediately spending another nuke. If your rofront wmd strategy includes a second strike, reserve one only when the payoff is decisive and the economy is secure.
Scenario four: a powerful coalition is forming
Two nations have aligned and are taking territory that blocks several expansion routes. A disruptive strike may be worth considering, but the target should be the coalition’s vulnerable point, not simply its largest city. The objective is to delay consolidation while your normal campaign gains a better position.
Diplomacy, border pressure, and economic growth can also weaken the coalition. The RoFront bombing guide discusses offensive pressure and defensive considerations, which can help you judge whether another weapon or a safer engagement is more appropriate.
Timing correction checklist
| Mistake | Why it reduces value | Correction |
|---|---|---|
| Launching out of anger | No clear strategic benefit | Name the intended territorial gain first |
| Striking an irrelevant target | Damage does not affect your route | Choose a target connected to 80% control |
| Delaying the follow-up | Enemy regains initiative | Advance immediately after impact |
| Draining all funds | Normal operations become vulnerable | Preserve defense and production |
| Ignoring allies | A local success becomes a wider war | Check the retaliation landscape |
| Waiting for a perfect moment | The target stabilizes | Act inside a reasonable window |
Final timing checklist before launch
A reliable nuke timing guide ends with a repeatable decision, not a universal rule. This rofront nuke timing guide is built around campaign value, target weakness, economic stability, and follow-through. Use the final check below immediately before committing to a launch.
| Last-minute question | Yes means | No means |
|---|---|---|
| Does the target matter to my path to 80% control? | It has clear strategic value | Revisit the target |
| Is the target currently vulnerable? | A real window exists | Wait for better conditions |
| Can my economy continue operating afterward? | The strike is affordable | Rebuild the reserve |
| Is my nearby territory secure? | Counterattack risk is controlled | Stabilize the front |
| Do I know what happens next? | The launch has a follow-up plan | Plan the advance first |
| Is the benefit worth the escalation? | The payoff justifies the action | Use conventional pressure |
The central takeaway is simple: the best nuke strike is timely, affordable, and consequential. Save it for a target whose weakness aligns with your territorial goals, protect your economy before the launch, and move immediately afterward. Exact prices and timings may shift as RoFront develops, so rely on current community observations for specific values while keeping your decisions tied to the larger campaign toward 80% control.
Frequently Asked Questions
When is the best time to use a nuke in RoFront?
The best time is when your target is already weakened, strategically important, and unable to reinforce quickly. Strike when the target’s attention is divided and your own territory is stable. The ideal launch creates a territorial opening that you can occupy immediately, rather than merely causing damage that the opponent can repair later.
Should I save money or use my funds for conventional attacks first?
Save for a nuke while securing your core economy and frontline, because a strike should not force you to abandon ordinary operations. Use conventional attacks when they can create the opening cheaply, improve your position, or weaken the target. The balance changes with every update, so compare current community-observed prices with your own income.
Is a nuke always the strongest weapon in RoFront?
No. A nuke can deliver the greatest immediate impact, but conventional weapons, economic growth, and diplomacy may be stronger in a particular situation. Use a nuke when one critical position has disproportionate value and is temporarily vulnerable. Otherwise, a sustainable combination of attacks and expansion may produce more progress toward 80% control.
How can I tell if a target is poorly defended?
Look for divided attention, lost territory, delayed reinforcement, and weak activity around the position you intend to attack. Compare those signs with your own readiness and the target’s alliance situation. A visually small area can still be a poor target if it is heavily defended, while a larger region may be vulnerable if reinforcements are far away.
What should I do after launching a nuke?
Move your regular forces toward the damaged area, protect the territory you gain, and prevent the opponent from counterattacking your exposed border. Do not wait for the battlefield to settle passively. Your follow-up plan determines whether the strike produces lasting control or merely delays the enemy, so confirm that path before launching.