
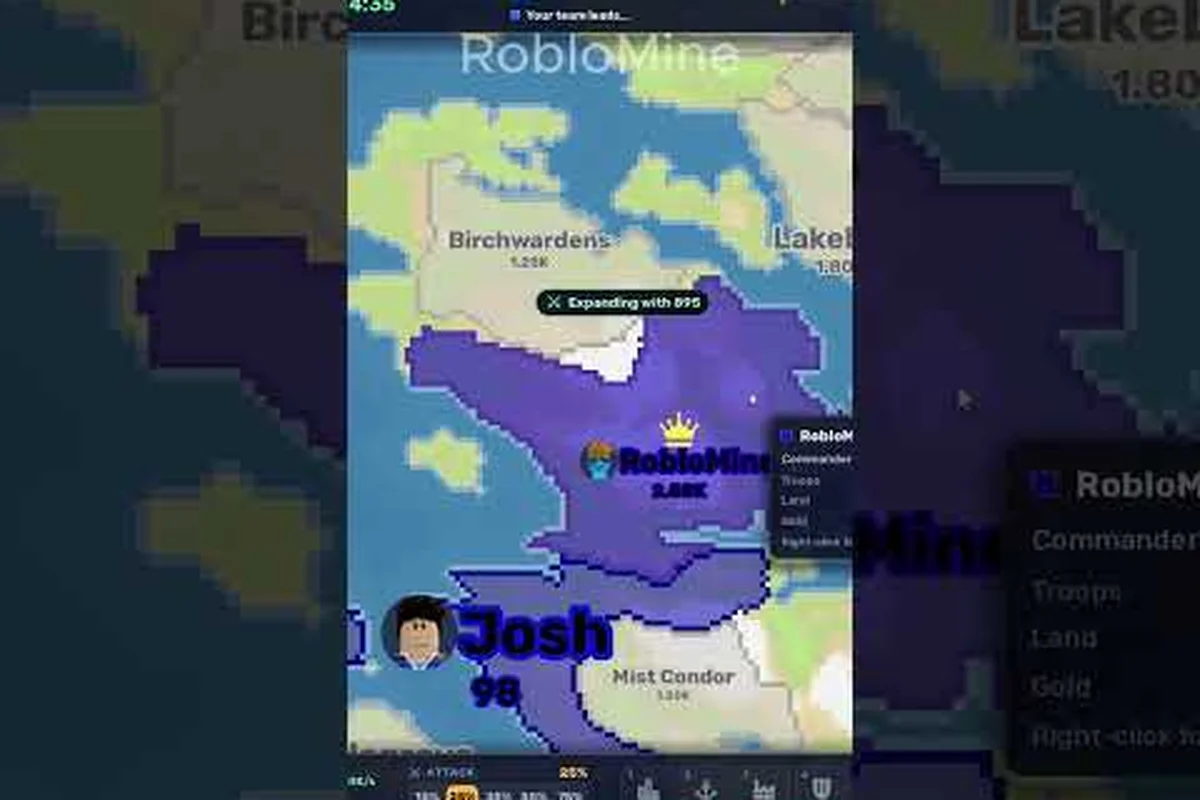
In RoFront, borders determine which expansion routes are worth the risk, so this border guide explains how to read neighboring nations, protect your economy, and choose safer targets while pursuing the 80% world-control objective. Compare each neighbor’s land access, resource pressure, and military reach before committing; for example, expanding toward a nation with a narrow land corridor and weak border pressure is often safer than contesting a direct route beside a heavily developed empire. The goal is not merely to capture the highest-value regions, but to secure borders that reduce repeated defense demands, preserve income, and keep your next territorial move predictable.
How RoFront Borders Shape Your Expansion
RoFront is a shared-world territory game in which nations attack neighboring territories, develop cities, ports, and factories, and compete for control of the world. The official RoFront game page lists 88 player nations and hundreds of tribes, with servers capped at 55 players. That mix makes border selection essential: your next move can gain valuable space or pull you into a conflict that stretches your economy thin.
The shared border between territories is more than a decorative map line. It determines which neighbor you can threaten, where your troops must travel, and whether an attack can be supported by nearby production. Because RoFront launches from a single nation, your first border choices can shape the entire opening phase.
| Map factor | Why it matters at the border | Early decision |
|---|---|---|
| Adjacent nation | Defines the immediate threat and attack route | Compare strength before expanding |
| Nearby cities | Supports troops, trade, and territorial control | Favor a useful urban hub |
| Nearby ports | Improves access to distant regions and resources | Check whether the route is worth defending |
| Nearby factories | Supports production required by your army | Avoid attacking without economic cover |
| Open space | May provide room to maneuver | Valuable when rivals block direct routes |
| Weak tribal land | Can create incremental gains | Best used for low-risk consolidation |
Borders in the Early Game
The official overview describes RoFront as real-time conquest on a shared map, beginning with one nation and expanding through border attacks. That structure makes the opening map position important, although no single position guarantees victory. The value of a border depends on the activity around it, the condition of your own nation, and whether your neighbors are already committing forces elsewhere.
This is the core of rofront how borders work: a border is simultaneously an opportunity, a route, and a security concern. A weak neighbor may be an easy target, but attacking them can also pull a stronger ally into the conflict. Conversely, a powerful neighbor can be dangerous to challenge directly yet useful as a shield while you strengthen your interior economy.
A Practical Border Checklist
Before attacking, identify what your nation can sustain. The official page emphasizes that expansion depends on cities, ports, factories, troops, alliances, and eventually nuclear weapons, so an isolated attack without economic support is risky. Use the following checks before committing:
-
Territorial value: Does the target contain a city, port, factory, resource route, or strategically useful land?
-
Travel distance: Can your troops reach the front quickly, or will the march expose weaker settlements?
-
Enemy pressure: Are neighboring nations already fighting, building, or forming a defensive line?
-
Production cover: Can your economy replace troops, factories, and equipment lost during the attack?
-
Retreat space: Do you have a safe route back if the advance stalls?
-
Victory value: Will this gain bring you materially closer to controlling 80% of the world, rather than merely enlarging a corner?
A border that looks attractive on the map can still be a poor target if it requires a long supply route and offers no strategic asset. In RoFront, distance matters beyond marching time: a remote frontline can stretch troop movement, delay reinforcement, and leave nearby cities or factories exposed to enemy pressure. A target is more defensible when its land connects a usable city, port, factory, or resource route to territory you can reinforce. If that network is absent, a visual gain may create more border-management problems than it solves, especially when the advance does not materially improve your path toward controlling 80% of the world.
Comparing Neighboring Nations and Territories
A useful RoFront border guide does not rank neighbors by apparent size alone. Size indicates reach, but activity, adjacency, and immediate military pressure tell you where danger is concentrated. A large nation split across several fronts may be weaker at one border than at another, while a smaller nation next to your main expansion route may deserve urgent attention.
The list of nations in RoFront is useful for identifying who controls a region, but it should not replace live map evaluation. Names, borders, ownership, and server populations can change as matches develop. Verify the current world view before making a strategic commitment.
Border Threat Ratings
Rate each neighbor in three separate categories instead of assigning one vague label. This makes the rofront land guide more actionable because the same territory can be attractive in one category and dangerous in another: compare military pressure, local resource value, and the stability of nearby factions. For example, a nation with a weak army but abundant production may be a low military threat yet a valuable target, while a heavily defended but resource-poor border can still dictate your expansion route in the rofront continent guide. Separating these factors helps you decide whether to consolidate, fortify, negotiate, or attack, without treating a single “rofront border” rating as permanent.
| Rating | What to look for | Recommended response |
|---|---|---|
| Low threat | Weak presence, little nearby activity, modest value | Consolidate or take after securing production |
| Moderate threat | Active defense and meaningful local value | Fortify, scout, and prepare a measured attack |
| High threat | Strong army presence and important strategic assets | Build allies, improve borders, or avoid direct action |
| Volatile threat | Several nearby powers are fighting or shifting control | Wait for the situation to settle |
| Valuable target | Strategic infrastructure with limited immediate pressure | Plan carefully and protect the supply route |
Do not treat these labels as permanent intelligence. A quiet neighbor may mobilize quickly, and a distracted nation may suddenly redirect troops after a faction shifts. The strongest border strategy therefore tracks current movement instead of locking into one rating: a high-threat neighbor losing troop strength may become a consolidate-or-attack opportunity, while a volatile area can turn into a fortified frontier. In the rofront border guide, recheck military pressure, local resource value, and faction stability before committing, preserving the flexibility to negotiate, fortify, or expand elsewhere.
Reading Economic Value
Infrastructure should influence your target list before raw land area does. The official game page identifies cities, ports, and factories as core development elements, which means controlling an empty region may contribute less than securing a connected economic hub. The best land is land that supports future expansion, reduces travel time, or protects existing settlements.
Use a three-part value calculation to compare prospective border targets. First, estimate the production output of nearby cities, factories, ports, and resource deposits; a hub beside a trade route may be more valuable than a larger territory with no infrastructure. Next, measure the network benefit: the route should shorten movement between settlements or connect an isolated frontier to a developed region. Finally, assess defensive value by checking whether the position forces enemies through a narrow corridor or blocks access to a strategic port. For example, a coastal factory that links two settlements and sits behind a difficult approach can outrank a barren, expansive border. This calculation helps prioritize where to scout, fortify, and build a forward outpost before committing troops.
-
Production value: What factories, cities, ports, or resources does the target contain?
-
Network value: Does it connect settlements, open a route to another region, or reduce the distance between your active fronts?
-
Defensive value: Would controlling it make an important border much harder for an enemy to cross?
A border target that scores strongly across production, network, and defensive value should become the next priority on your scouting list. For example, a modest territory containing a port connected to a city and factory can outperform a large barren expanse, because it improves resource movement while denying an enemy a useful staging point. Treat a large but unproductive area as a low-priority grab when another border is under immediate threat, and reserve your troops, fortification resources, and forward outpost plans for the more consequential position.
Choosing the Best Place to Start
The best starting location in RoFront is not simply the quietest corner of the map. A low-conflict area may let you build slowly, but it can also leave you far from infrastructure and meaningful borders. Your first position needs enough opportunity to produce troops, connect to valuable systems, and avoid becoming boxed in by stronger neighbors.
This is where the rofront best starting location question depends on the current match. Examine the same opening position from several angles, especially how adjacent provinces divide your armies, resources, and future expansion routes. A border position beside a coastal port may shorten supply lines, but it can also expose you to early naval pressure; an inland position near a neutral system may provide safer troop production, yet restrict access to sea trade. Compare the province’s resource output, connectivity, and likely approach routes before committing, rather than judging the location by distance alone.
-
Economic access: Are cities, ports, or factories available without a long exposed march?
-
Border quality: Does the nation touch several possible neighbors, or only one dangerous direction?
-
Room to expand: Can your territory absorb a new province without choking your economy?
-
Early pressure: Are nearby nations already expanding, or is the surrounding map temporarily stable?
-
Long-term shape: Can you build outward toward useful regions instead of circling your starting territory?
Start Position Comparison
| Starting condition | Main benefit | Main risk | Best approach |
|---|---|---|---|
| Coastal hub | Strong port access and regional movement | Exposed to naval pressure | Develop production before expanding |
| Inland industrial area | Factories support sustained growth | Limited escape routes | Build a secure interior first |
| Quiet corner | Time to train and organize | Few valuable targets nearby | Use the pause for infrastructure |
| Central crossroads | Several expansion directions | Competing threats on multiple fronts | Choose one corridor early |
| Frontier position | Immediate access to new land | Constant border pressure | Build alliances and defenses |
| Tribe-dense region | Many incremental targets | Scattered, unpredictable resistance | Secure one sector before spreading |
For a deeper look at map positioning and the world-control objective, see our RoFront starting location strategy. It provides useful context for deciding whether a location offers a path toward the 80% conquest goal instead of merely delaying the first attack.
Deciding Where to Attack First
Your first attack should solve a specific problem. It might open access to a port, remove a dangerous neighbor, protect a city, or connect two parts of your territory. Random expansion can produce scattered holdings, scattered resources, and more fronts to defend. Focused border pressure is easier to support and gives every conquest a clear purpose.
Four Attack Objectives
| Objective | Border condition | Strategic result |
|---|---|---|
| Economic capture | Target contains a factory, city, or port | Improves production and supports future troops |
| Defensive seizure | Enemy controls land near a critical settlement | Reduces immediate attack routes |
| Corridor opening | Target links separated regions | Shortens movement and unifies territory |
| Consolidation | Enemy holds a weak border segment | Fills gaps and reduces fragmented defense |
Before moving, ask what happens if the attack fails. If losing the offensive force would expose your economy or leave another enemy free to strike, prepare more before committing. The official game overview lists 88 nations, so an isolated player can still become part of a wider contest. A local victory may draw attention from powers that were not initially involved.
Attack Decision Sequence
-
Survey every adjacent nation. Record which sides contain cities, ports, factories, open routes, and concentrated armies.
-
Choose one measurable objective. For example, secure a coastal port or remove a border that threatens your capital area.
-
Protect the route behind the attack. A narrow corridor must remain safe while troops occupy the target.
-
Prepare the economy. Confirm that production and logistics can support the operation without abandoning another front.
-
Attack with room to adapt. If the opponent redirects defenses, use nearby open space rather than extending deeper into a trap.
-
Consolidate immediately. Turn the capture into a stable position before starting a second major operation.
This sequence turns the border guide into a cost-aware operation rather than a list of attractive targets. For example, a nearby port may offer a short march and immediate access to coastal trade routes, but it can still be a poor choice if capturing it requires crossing a narrow land corridor, triggers an enemy counterattack, and diverts production from a threatened capital. Judge each objective by the full chain of armies, supply lines, logistics capacity, and consolidation needs; convenience on the map does not guarantee a worthwhile front.
Defending Borders Without Overextending
Expansion creates more borders, and every new border can divide attention. The strongest defense is not simply more troops; it is a combination of production readiness, clear warning signs, and a decision about which ground truly matters. A nation that tries to hold every claimed patch may become stronger on paper yet vulnerable to focused attacks elsewhere.
The beginner discussion on r/Roonby’s RoFront strategy thread reinforces the basic loop of building an economy, training troops, and engaging other nations. Community advice can help identify beginner priorities, although balance changes may make older details less reliable.
Prioritize Defensive Layers
-
Inner ring: Protect cities, ports, factories, and routes that keep the economy functioning.
-
Middle ring: Monitor active neighboring nations and use border fortifications to make attacks costly.
-
Outer ring: Use valuable expansions and forward positions to absorb pressure, provided they remain supportable.
This structure prevents you from treating every tile as equally important. A distant province may be expendable compared with a central factory, but a key passage or port may be worth holding even when it contains little land. Border value depends on what enemies can accomplish if they cross it.
When to Hold, Fortify, or Retreat
| Situation | Best decision | Reason |
|---|---|---|
| Enemy attacks a low-value outer province | Defend if affordable; otherwise yield it | Preserve troops and protect the core |
| Enemy approaches a production hub | Fortify and reinforce | Production loss can destabilize the whole nation |
| Two enemies pressure opposite sides | Reinforce one side and negotiate or reposition | Splitting forces can invite defeat |
| A corridor becomes trapped | Withdraw before encirclement | Saved troops can rebuild elsewhere |
| Ally requests help at a shared border | Support when it protects both positions | Mutual defense is more efficient than solo overextension |
| No immediate threat is visible | Upgrade production and scout | Free time should strengthen future options |
The RoFront beginner strategy overview is a useful companion for balancing military action with early economy development. The central principle in every case is to preserve the ability to respond, because border pressure often arrives from more than one direction.
Managing the Map Across a Full Match
Early borders are only the first layer of strategy. As your territory grows, the map becomes a network of fronts, production centers, and rival spheres. A successful RoFront continent guide must therefore connect land to economy, timing, and diplomacy rather than treating each captured region as a separate achievement.
Early, Middle, and Late Border Phases
| Match phase | Main border objective | Common mistake | Better approach |
|---|---|---|---|
| Opening | Build production and test one safe target | Attacking before the economy supports troops | Secure infrastructure first |
| Expansion | Create one coherent corridor | Capturing unrelated regions too quickly | Choose connected objectives |
| Consolidation | Stabilize gains and reduce exposed fronts | Treating every province as permanent | Rank holdings by value |
| Late game | Link major economic regions | Leaving isolated pockets undefended | Concentrate forces before the final push |
| Victory stage | Control enough of the world | Stopping at a large but incomplete map | Evaluate the 80% threshold |
Your priorities should shift with scale. A small nation may need one dependable neighbor to support early growth, while a larger nation needs ports, factories, and routes distributed across several regions. For a broader view of the conquest path, our RoFront domination strategy explains how military growth and map control work together.
Managing Multiple Fronts
A continent-wide campaign forces you to divide attention, so use a tiered priority system: secure a core settlement’s production, then monitor the border that can unlock adjacent land, and finally hold the most exposed frontier. For example, if an enemy incursion targets a low-value province while a major trade route remains quiet, verify the map before committing your army; the visible battle may be screening a larger advance. This approach keeps your economic base stable while preserving the option to reinforce a second front without abandoning the first.
-
Economic integrity: Can your core settlements keep producing?
-
Contested value: Which borders contain assets worth taking or protecting?
-
Enemy concentration: Where are enemy forces most likely to reinforce?
-
Geographic connection: Does one conquest enable the next?
-
Defensive resilience: Can you survive a second attack while handling the first?
Rotate attention according to these factors, not according to which battle is loudest. A sudden attack on a minor province may be a distraction, while quiet preparation along a major economic border may signal a larger offensive. Community reports and visible player behavior can help with reconnaissance, but never replace a direct map check.
Diplomacy as Border Management
Alliances can make borders safer by reducing the number of enemies you must watch. They also create obligations, so a useful alliance should clarify shared threats, nearby enemies, and likely expansion directions. The official page specifically mentions alliances as part of the broader conquest loop, alongside cities, ports, factories, troops, and nuclear weapons.
Before joining a major power, consider whether it shares your enemy or competes for the same target. A nearby ally can be excellent until both sides want the same corridor. Treat diplomacy as border risk management: compare immediate benefits against future strategic conflicts.
Common RoFront Border Mistakes
Even a good opening can fail when a player mistakes map size for map control. The most common errors involve poor target selection, unclear priorities, and treating every border equally. Avoiding these mistakes makes the difference between a coherent empire and a collection of disconnected claims.
Mistake 1: Attacking the Weakest Neighbor Every Time
A weak target can be a trap. Another nation may be waiting for both players to commit troops before moving into an exposed front. A better plan considers the entire neighborhood, including who benefits from your attack and which borders become safer or more dangerous afterward.
Mistake 2: Expanding in Several Directions
Early expansion is strongest when it forms a connected shape, because border control depends on the Land, border, and territory links you can actually maintain. A compact claim is easier to defend, supply, and connect economically than scattered outposts: if distant patches are not linked to the main advance, each one diverts troops and production from the border push that matters. For example, taking a nearby border strip that joins your existing territory is usually more valuable than claiming an isolated patch across a separate land corridor, since the latter creates two fronts instead of one consolidated front line.
Mistake 3: Ignoring the Return Route
Capturing land is only half the operation; you must hold it. Before crossing a border, check whether your supply route can survive a counterattack. A narrow corridor is especially valuable because it can threaten your entire position if the enemy cuts it.
Mistake 4: Treating Cities, Ports, and Factories as Equal
Each infrastructure type supports a different part of the map. Cities anchor settlement, ports connect regions, and factories support production. Your target value depends on the problem you need to solve, so compare infrastructure by strategic role rather than by a single universal ranking.
Mistake 5: Assuming Peace Lasts
A border that is quiet for ten minutes may look permanently safe, but RoFront’s real-time pressure can turn that calm into an encirclement in a single cycle. If a patrol pauses at a neutral landmark, treat it as a reconnaissance gap rather than proof of control: keep a second production queue running, scout the connecting corridors, and preserve enough emergency capacity to reposition defenders. Spending every reserve on one frontier attack can leave supply routes and nearby land exposed, so evaluate the whole neighborhood before committing.
| Mistake | Correction | Result |
|---|---|---|
| Choosing by enemy weakness alone | Evaluate the whole neighborhood | Fewer indirect attacks |
| Capturing disconnected land | Expand along connected corridors | Easier defense and logistics |
| Ignoring supply routes | Protect the path home | Lower risk of encirclement |
| Treating infrastructure alike | Match targets to strategic needs | Better economic returns |
| Assuming temporary peace is permanent | Maintain reserves and scouting | Better response to sudden threats |
The practical takeaway is simple: border decisions should connect land, economy, and timing. For example, if a neutral landmark looks secure but sits beyond a vulnerable supply corridor, claim the corridor before treating the landmark as a dependable frontier anchor. In this RoFront border guide, weigh connected territory, production routes, and reserve capacity together; otherwise a seemingly strong border can expose the continent’s economy to a sudden encirclement. Reevaluate the framework whenever patrol pressure shifts, a new corridor opens, or the strategic value of nearby land changes.
Frequently Asked Questions
Where should a new player expand first in RoFront?
New players should usually target the closest useful infrastructure, such as a city, port, or factory, rather than empty distant land. The target should have a manageable defense and a short supply route. This approach supports troop production and creates a stronger foundation for the next expansion.
What makes a good starting location in RoFront?
A good starting location combines economic access, manageable border pressure, and room to grow. Two or three manageable neighbors are often better than one empty direction. Players who want a detailed map assessment should compare the current world view with the principles in the RoFront starting location strategy.
Should RoFront players attack weak or strong neighboring nations?
Attack weak neighbors when the objective is low-risk consolidation, but reconsider if a stronger power can exploit the distraction. Strong targets may hold superior infrastructure, making them worth preparing for later. Always compare the expected strategic gain with the cost of defending the captured border.
How can a player protect several borders at once?
Prioritize the borders protecting production, cities, ports, and supply routes. Use the outer provinces to absorb lower-value attacks, reinforce one front at a time, and avoid spreading troops so thinly that every position collapses. Diplomacy may also reduce pressure, but only when the alliance fits your wider expansion plan.
Does controlling more land automatically improve a RoFront nation?
No. Additional land helps only when it is connected, useful, and defensible. Fragmented territory can create more borders, longer supply routes, and excess demands on the economy. The strongest expansion strengthens the whole network rather than simply increasing the amount of claimed ground.