
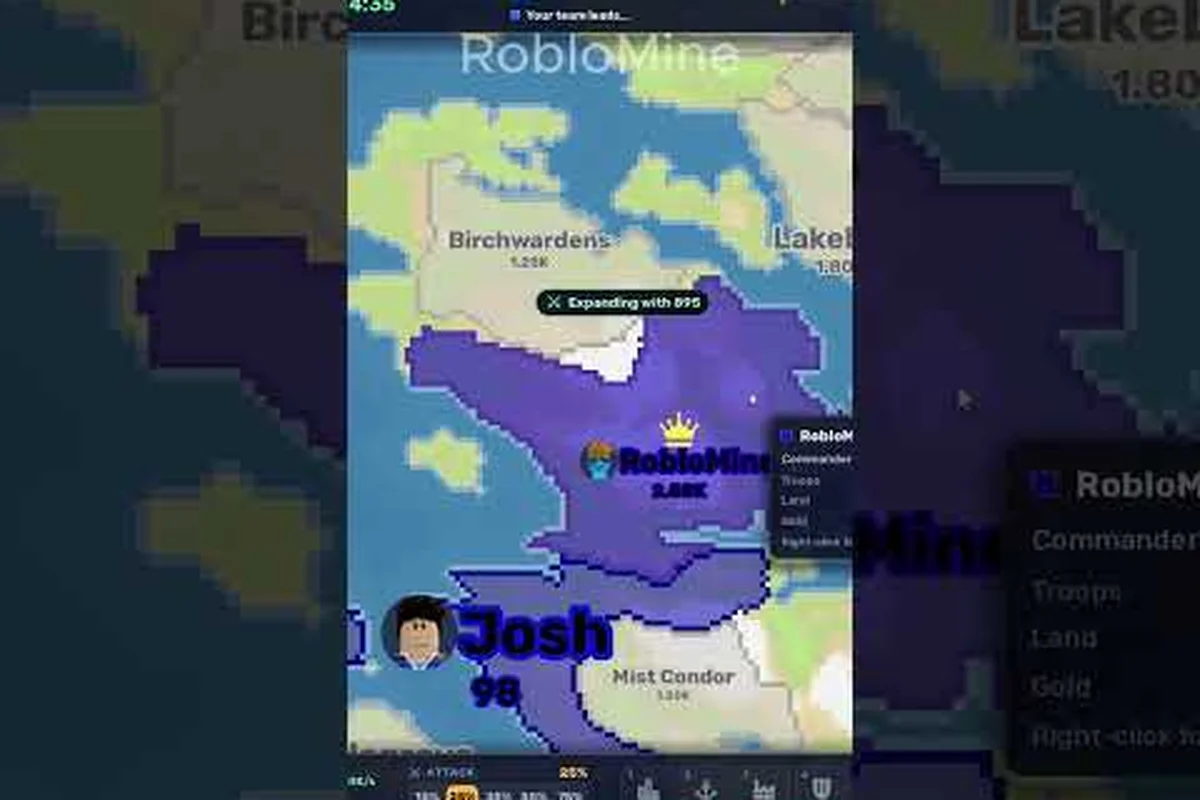
Understanding the RoFront map guide is essential because every expansion, attack, and alliance occurs on a shared world where position matters as much as military strength. Learn how to read borders, choose routes, exploit unclaimed land, and avoid being trapped before your economy has time to grow.
RoFront Map Overview: Understanding the Shared Battlefield
The RoFront world map places 88 player nations and hundreds of AI tribes into one continuous conquest arena. According to RoFront's official game page, players begin with a nation, build cities, ports, and factories, then compete for additional territory. The stated victory condition is control of 80% of the world, so a distant border matters only when it supports a practical path toward that objective.
This map overview also reveals why early positioning deserves more attention than random fighting. A large nation may look powerful on the screen, but its usefulness depends on local connections, defensible borders, and access to useful land. Understanding those relationships gives you a clearer basis for selecting a starting point than simply chasing the largest visible territory.
| Map element | What it represents | Strategic significance |
|---|---|---|
| Player nations | Territories controlled by human players | Offers alliances, trade, and potential enemies |
| AI tribes | Independent hostile factions | Provides early expansion targets and training |
| Unclaimed land | Territory outside current control | Creates routes between major regions |
| Borders | Edges of controlled territory | Defines where expansion can begin |
| Cities, ports, and factories | Developed settlements and infrastructure | Supports economic and military growth |
| 80% world-control goal | Stated victory condition | Turns scattered expansion into a measurable campaign |
Distinguishing Player Land from AI Territory
A rofront map overview becomes much easier when each color is treated as a relationship rather than decoration. Human-controlled land may be friendly, neutral, contested, or hostile, while AI territory usually presents a more predictable military risk. The official description identifies hundreds of tribes alongside the 88 player nations, creating a map with several layers of pressure rather than one uniform battlefield.
Watch the changes after each capture. A border that looks quiet can become active when one side improves its economy, recruits troops, or completes an infrastructure project. The useful visual signal is not simply “red next to blue,” but the development behind that border: dense settlements, repeated attacks, fresh units, and newly opened routes.
Why Geography Changes the Campaign
The rofront world map is not divided into isolated matches. Every nation operates in the same connected space, which means expansion can affect opponents several regions away. A player who captures an isolated corner may gain land but still lack a practical route toward neighboring populations, resources, and contested fronts.
The OpenFront Steam page describes the same core format: hundreds of real players battling simultaneously on a single shared world map. RoFront adapts that large-scale conquest structure for Roblox, which means the map should be treated as one interconnected campaign rather than a sequence of disconnected battles.
Reading Borders, Territory, and Strategic Choke Points
A useful rofront map explained approach starts with borders instead of unit icons. Borders show the shape of a player’s footprint, while their texture and activity reveal how stable that footprint is. A wide border beside a developed enemy may be dangerous, whereas a narrow connection to a weaker neighbor may offer a safer first expansion.
Focus on three border qualities: frontline pressure, defensive depth, and route value. A frontline is where attacks are most likely, defensive depth measures how many layers exist behind the first line, and route value describes whether the border can support movement toward another strategic region.
| Border feature | Positive signal | Risk signal | Recommended response |
|---|---|---|---|
| Weak neighboring AI | Low troop concentration | Hidden military build-up | Scout before committing |
| Narrow corridor | Concentrated defense | Chokepoint for the defender | Attack with numbers or bypass it |
| Coastal access | Potential port route | Exposed supply line | Protect the shoreline and harbor |
| Dense settlement chain | Strong economy and defense | Costly frontal assault | Develop elsewhere or outlast it |
| Quiet interior border | More time to plan | Limited immediate gain | Use for staging and consolidation |
| Active contested edge | Fast military pressure | Unstable front | Defend until strength is sufficient |
Identifying Valuable Frontier Land
Frontier territory is most useful when it connects your existing holdings to another important region. Capturing a remote patch produces a map-color change, but capturing a corridor can shorten travel, create a buffer, or position your army near a valuable enemy. This distinction is the core of effective rofront map strategy.
A good expansion target should offer at least two benefits. Examples include economic adjacency near developed land, strategic adjacency beside a major route, or defensive adjacency behind an existing city. If a target provides only land with no connection to your base, its value may be mostly temporary unless it opens a broader path later.
Understanding Internal and External Borders
An external border faces another nation or tribe, while an internal border lies between territories you already control. Internal seams can reveal the shape of a recent capture, insecure province, or overcrowded economy. If a region is visually enclosed but still lightly defended, it may be a weak point that an enemy will test before attacking your strongest settlement.
A rofront map navigation guide should therefore distinguish between visible ownership and meaningful control. A large region on the map may still function as several disconnected pockets if its supply network is weak. A smaller, compact territory with secure infrastructure can provide a stronger base because your army needs less time to move between priorities.
RoFront Map Tips for Choosing Expansion Routes
Efficient expansion depends on route order. Start with the nearest weak AI or neglected edge, then connect the captured ground to your main settlement. Avoid making several isolated captures merely because they are easy. Each new region should either strengthen an existing route or prepare the next one.
This route order works well for many early campaigns because it balances speed, safety, and growth on the rofront world map. Taking adjacent AI territory first offers high speed and safety in the opening, but a quiet weak-player border provides better long-term value, so the strongest expansion plan is to secure experience, link that gain to a core city, and then use the map shape to shorten the path to a valuable corridor. The route table shows why opening with a major nation or remote isolated land is usually less efficient: both have low speed or low long-term value, despite their potential for pressure.
-
Secure nearby AI land to obtain experience and reduce immediate threats.
-
Choose one compact neighboring region instead of scattering attacks across distant borders.
-
Link new territory to a core city to preserve reinforcement and supply access.
-
Build a second front only after the first is stable, particularly when a large nation is pressuring you.
-
Push toward valuable corridors or weaker neighbors, using map shape to reduce the distance between objectives.
| Route option | Speed | Safety | Long-term value | Best use |
|---|---|---|---|---|
| Adjacent AI territory | High | High | Medium | Opening expansion |
| Quiet weak-player border | High | Medium | High | Early territory gain |
| Coastal connector | Medium | Medium | High | Linking separated holdings |
| Neutral interior gap | Low | Medium | High | Bypassing strong borders |
| Direct attack on a major nation | Low | Low | High | Later decisive pressure |
| Remote isolated land | High initially | Medium | Low | Temporary buffer or bridge |
The 80% Goal Changes the Definition of Progress
Because the stated objective is 80% world control, percentage alone can be misleading. Thirty percent spread across isolated regions may look impressive while creating a fragile empire, whereas a connected chain of territories can produce a stronger foundation. This is why the starting location strategy guide matters: the place you begin can shape every later route.
Prioritize contiguous control, defendable infrastructure, and reliable movement before chasing scattered percentage gains. The best rofront map strategy is not necessarily the one that captures the most land at once; it is the one that keeps the next objective reachable.
When to Expand and When to Consolidate
Expand when nearby targets are weak, your borders are stable, and your economy can support the additional settlements. Consolidate when attacks are arriving from multiple directions, your cities are exposed, or your current territory has disconnected pockets. Acting on both fronts with insufficient resources is a common way to lose land that already required time to capture.
Community discussions on reading the map and selecting territory emphasize that territory, economy, troops, and regional pressure should be considered together. Those reports may lag balance changes, but the core lesson remains: map position only creates value when the player can protect and develop it.
Map Strategy for Early, Middle, and Late Expansion
A useful rofront map strategy changes as your territory develops. The early game is about creating a defensible base, the middle game is about connecting regions, and the late game is about breaking weak links in the global contest. Using the same route plan in every phase can leave you overextended or stuck behind enemy fortifications.
| Campaign phase | Main map objective | Preferred target | Main map risk |
|---|---|---|---|
| Early game | Establish a secure starting footprint | Nearby AI tribes | Overextending before economy develops |
| Early-to-mid game | Add a connected province | Weak adjacent player | Dividing troops across distant fronts |
| Mid game | Link holdings and protect infrastructure | Chokepoints and quiet borders | Losing the home region while pushing |
| Late game | Pressure weak links across the world | Isolated or lightly held territory | Rushing a defended major border |
| Victory push | Reach the 80% control goal | Contested territory near enemy clusters | Completing the percentage while surrendering key cities |
Early-Game Positioning
During the early game, favor compact territory with defensible edges and a nearby AI target. One connected region is easier to reinforce than four scattered provinces, and a successful early capture teaches you where enemy pressure originates. The territory-reading guide can help distinguish a safe opening from a corridor that merely looks empty on the map.
Do not neglect the economy while focusing on map control. A large territory without stable development can support fewer troops than a smaller, mature base. If settlements and factories remain vulnerable, learn more through the RoFront economy guide before launching another distant offensive.
Middle-Game Corridor Building
The middle game is the best time to turn isolated gains into a network. Look for a sequence of regions that can support a continuous advance: your core territory, a neutral gap, a weaker border, and then a valuable neighboring cluster. This creates several possible objectives, so one blocked route does not stop the entire campaign.
Prioritize corridors that reduce the distance to many settlements. Capturing one strategically placed strip can influence several fronts and improve reinforcement travel. A compact empire with a central corridor is often easier to manage than a wide empire whose territories point in opposing directions.
Late-Game Pressure and Isolation
Late-game map play often depends on identifying an opponent’s weak external connection. A major nation may have a strong center but a thin border, and attacking that thin edge can be more effective than challenging its strongest city. Still, avoid assuming that every quiet border is undefended; scout activity and look for concentrated troop movement before committing.
The overall domination guide is useful at this stage because map pressure must align with military strength. Nukes, alliances, and other high-impact tools can open a route, but they have little value if your economy, supply, and follow-up troops cannot occupy the ground afterward.
Practical Navigation and Decision-Making Checklist
Effective rofront map navigation depends on a repeatable observation routine: first scan the world map to locate the global front, then identify where pressure is concentrated, narrow the view to the relevant region, and inspect city strength, borders, and fortification before committing. For example, a sudden unit cluster beside a weakly connected city may signal an easier opening than the apparent main front, but only if a reinforcing route and a viable defender response are available. This layered check prevents temporary shifts in front activity from obscuring the larger strategic pattern and gives each expansion decision a concrete basis.
| Decision stage | Question to answer | Evidence to check | Result |
|---|---|---|---|
| Wide scan | Which regions are contested? | Front activity and unit concentration | Identify the main global front |
| Area selection | Where is pressure lowest? | Borders, cities, and recent captures | Choose a practical expansion area |
| Target check | Is the target connected? | Geography and existing holdings | Avoid isolated land grabs |
| Risk check | What can the defender bring? | Troop density and fortification | Choose a feasible attack |
| Timing check | Can we reinforce afterward? | City strength and route distance | Secure the capture before expanding again |
| Review | Did the move improve our position? | Connectivity, defense, and economy | Retain, consolidate, or redirect |
Reading the Map in Short Intervals
Check the world map at a steady interval, such as every few minutes during active play. Frequent short observations reveal trends better than occasional long inspections. A change in one small border may reveal an alliance, an offensive, or a defensive redeployment that affects your next move.
Record three practical details each time: where pressure increased, where a new border formed, and whether your own territory became more connected. These observations create a short strategic log without demanding a complex spreadsheet. They also help you avoid reacting only to the latest action while missing the broader front.
When to Reroute
Abandon a planned route when the target becomes heavily defended, your original border is attacked, or the route no longer connects to a useful objective. Flexibility matters because the shared world changes while you move. A good route was chosen under specific conditions, and new information should be allowed to change it.
At the same time, avoid changing plans after every minor event. Establish a minimum reason for rerouting: a meaningful enemy build-up, the loss of a key city, a newly opened opportunity elsewhere, or insufficient resources to continue. This balance prevents both stubborn attacks and constant indecision.
Connecting Map Control to a Winning Campaign
The strongest rofront map tips combine spatial awareness with economic and military timing. Control is valuable when it funds expansion, protects production, and places your forces closer to the next objective. A map that looks impressive but leaves your core exposed is not a winning position.
A practical rofront map review should compare each connected province with the cost of holding it, using the connectivity, security, expansion value, opportunity cost, economy, and enemy-pressure criteria in the final map review table. For example, capturing a region that adds production income but places a factory within one enemy approach may be a poor trade until a second defense route exists. The same province can become strategically valuable once roads, ports, and troop deployment create a protected development corridor toward the next objective.
-
Connectivity: Can troops and resources move between your important territories?
-
Security: Are your cities, ports, and factories protected by more than one viable defense route?
-
Expansion value: Does the next captured region improve income, safety, or access?
-
Opportunity cost: What defensive commitment are you giving up to claim it?
| Final map review | Strong result | Warning sign | Action |
|---|---|---|---|
| Connectivity | Major holdings form a clear network | Isolated provinces | Consolidate before pushing |
| Security | Multiple defensive options exist | One city carries every front | Redirect troops and build depth |
| Expansion | New land supports the next objective | Land ends at a dead end | Select a better route |
| Economy | Captured territory strengthens development | Expansion outruns production | Pause and stabilize |
| Enemy pressure | Attacks target exposed edges | Several fronts activate together | Consolidate defensive sectors |
The map is therefore not a separate puzzle from the rest of the game. It is the surface that shows where economic pressure, military commitments, and territory claims intersect. A good player uses that information to choose one meaningful advantage at a time rather than attempting to react to every visible change.
Frequently Asked Questions
What is the main goal on the RoFront world map?
The stated objective is to control 80% of the world. However, percentage is most useful when your territory remains connected, developed, and defensible. Scattered lands can appear impressive while leaving cities and supply routes vulnerable, so progress should be measured through both control and strategic cohesion.
How should I choose a starting location in this rofront map guide?
Choose a position that offers a nearby weak target, a defensible core, and a possible route toward later objectives. Avoid starting far from useful connections unless the area has strategic value. The best region usually supports a connected campaign rather than a sequence of isolated captures.
Are AI tribes the safest early expansion target?
AI tribes are often suitable for learning and early expansion because their movements can be more predictable than those of experienced players. They can still concentrate forces or occupy valuable routes, so scouting remains important. Treat them as practical early goals rather than guaranteed effortless victories.
How do I tell whether a narrow border is a trap?
Inspect both sides for fortification, troop concentration, and a strong city behind the border. A narrow corridor may expose you to a defender who can reinforce faster than you can cross. If the target lacks a clear payoff and your neighboring area is stronger, bypassing the corridor may be the safer map decision.
Should I spread out early to reach 80% faster?
Not usually. Early expansion is more valuable when it connects to your core and improves your economic position. A compact, secure region is easier to defend and develop, while scattered captures can consume troops and stretch supply routes. Expand broadly only after your first area is stable and your resources can support it.